8.4 KiB
| title |
|---|
| wazuh |
Support level: Community
What is wazuh
wazuh is an open source Security Information and Event Management System that also has (extended) Endpoint Detection & Response (XDR) capabilities, as well as components of a Network Intrusion & Detection System (NIDS).
:::note We assume that you already have wazuh and authentik installed/setup and now want to integrate authentik as your IDP solution to have SSO within wazuh. :::
Preparation
The following placeholders will be used:
wazuh.companyis the FQDN of the wazuh server instance.authentik.companyis the FQDN of the authentik install.
While wazuh allows both LDAP and SAML integration, in this post we will only walk through the SAML integration.
Step 1 - certificates
The first step would be to add a certificate for wazuh.
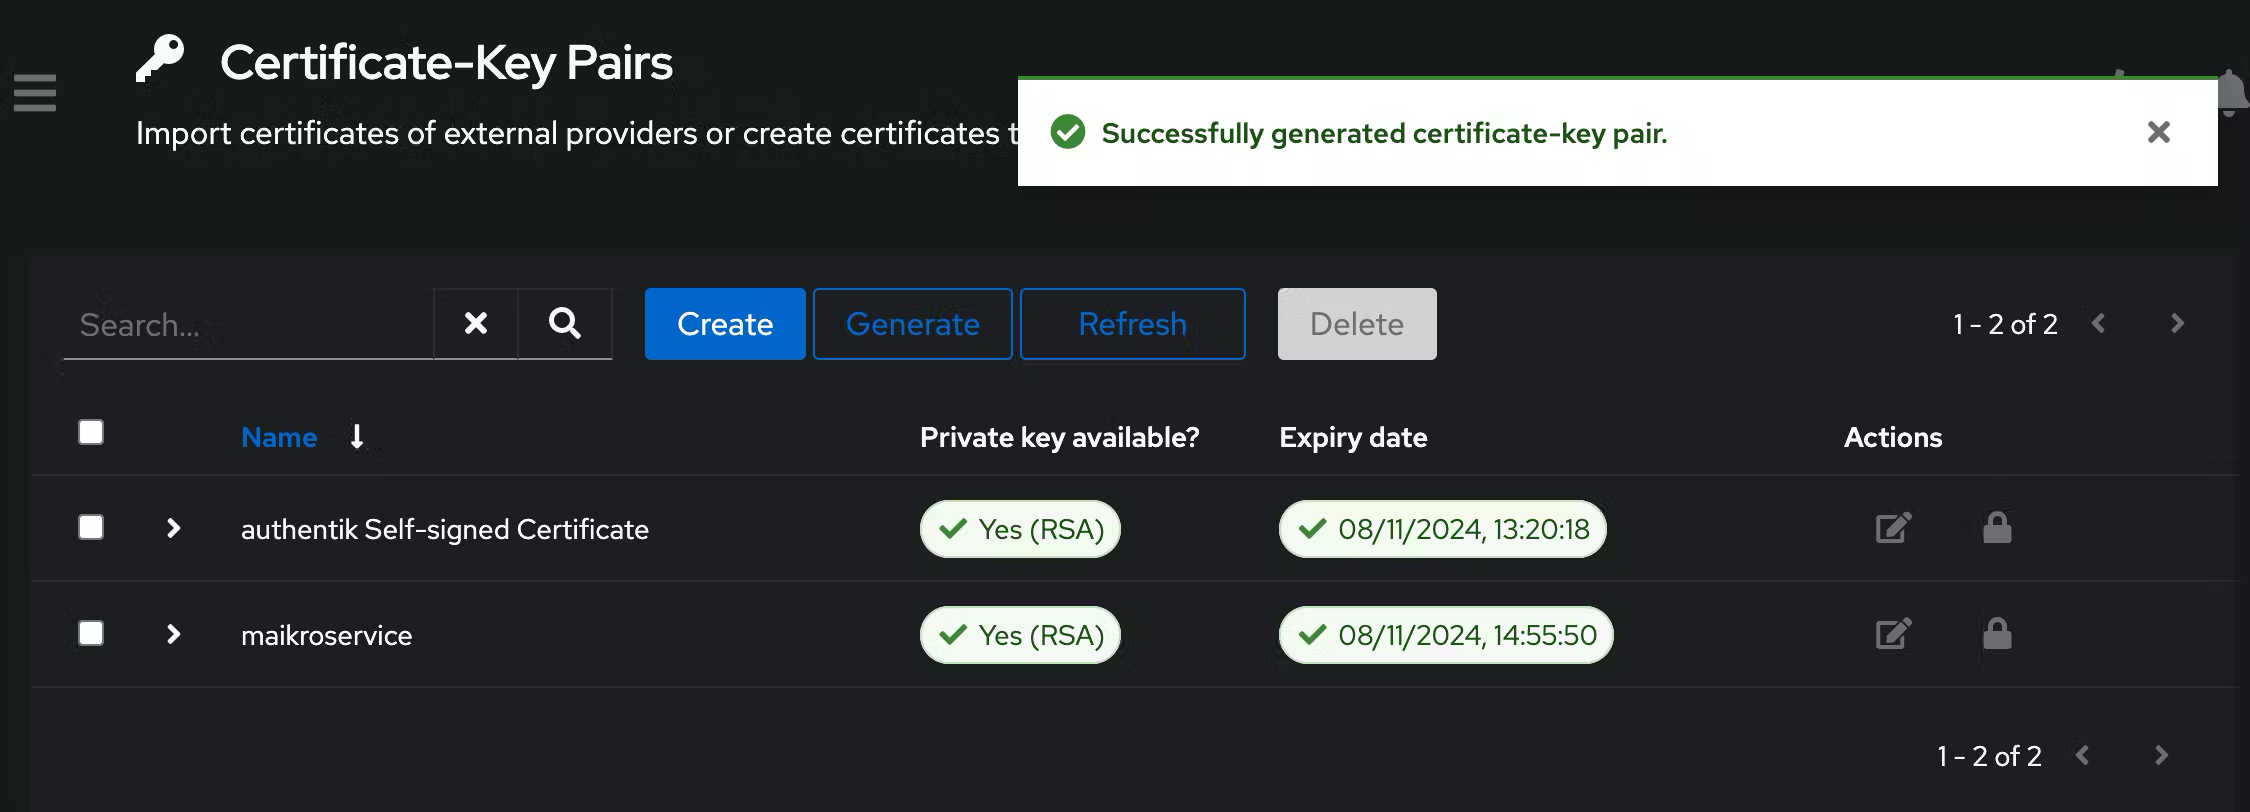
You can generate a new one under System -> Certificates -> Generate in the Admin interface of authentik.
Add a name, set the validity period to 365 days and click Generate.

If all goes well authentik will display a message like the one below
Step 2 - saml provider
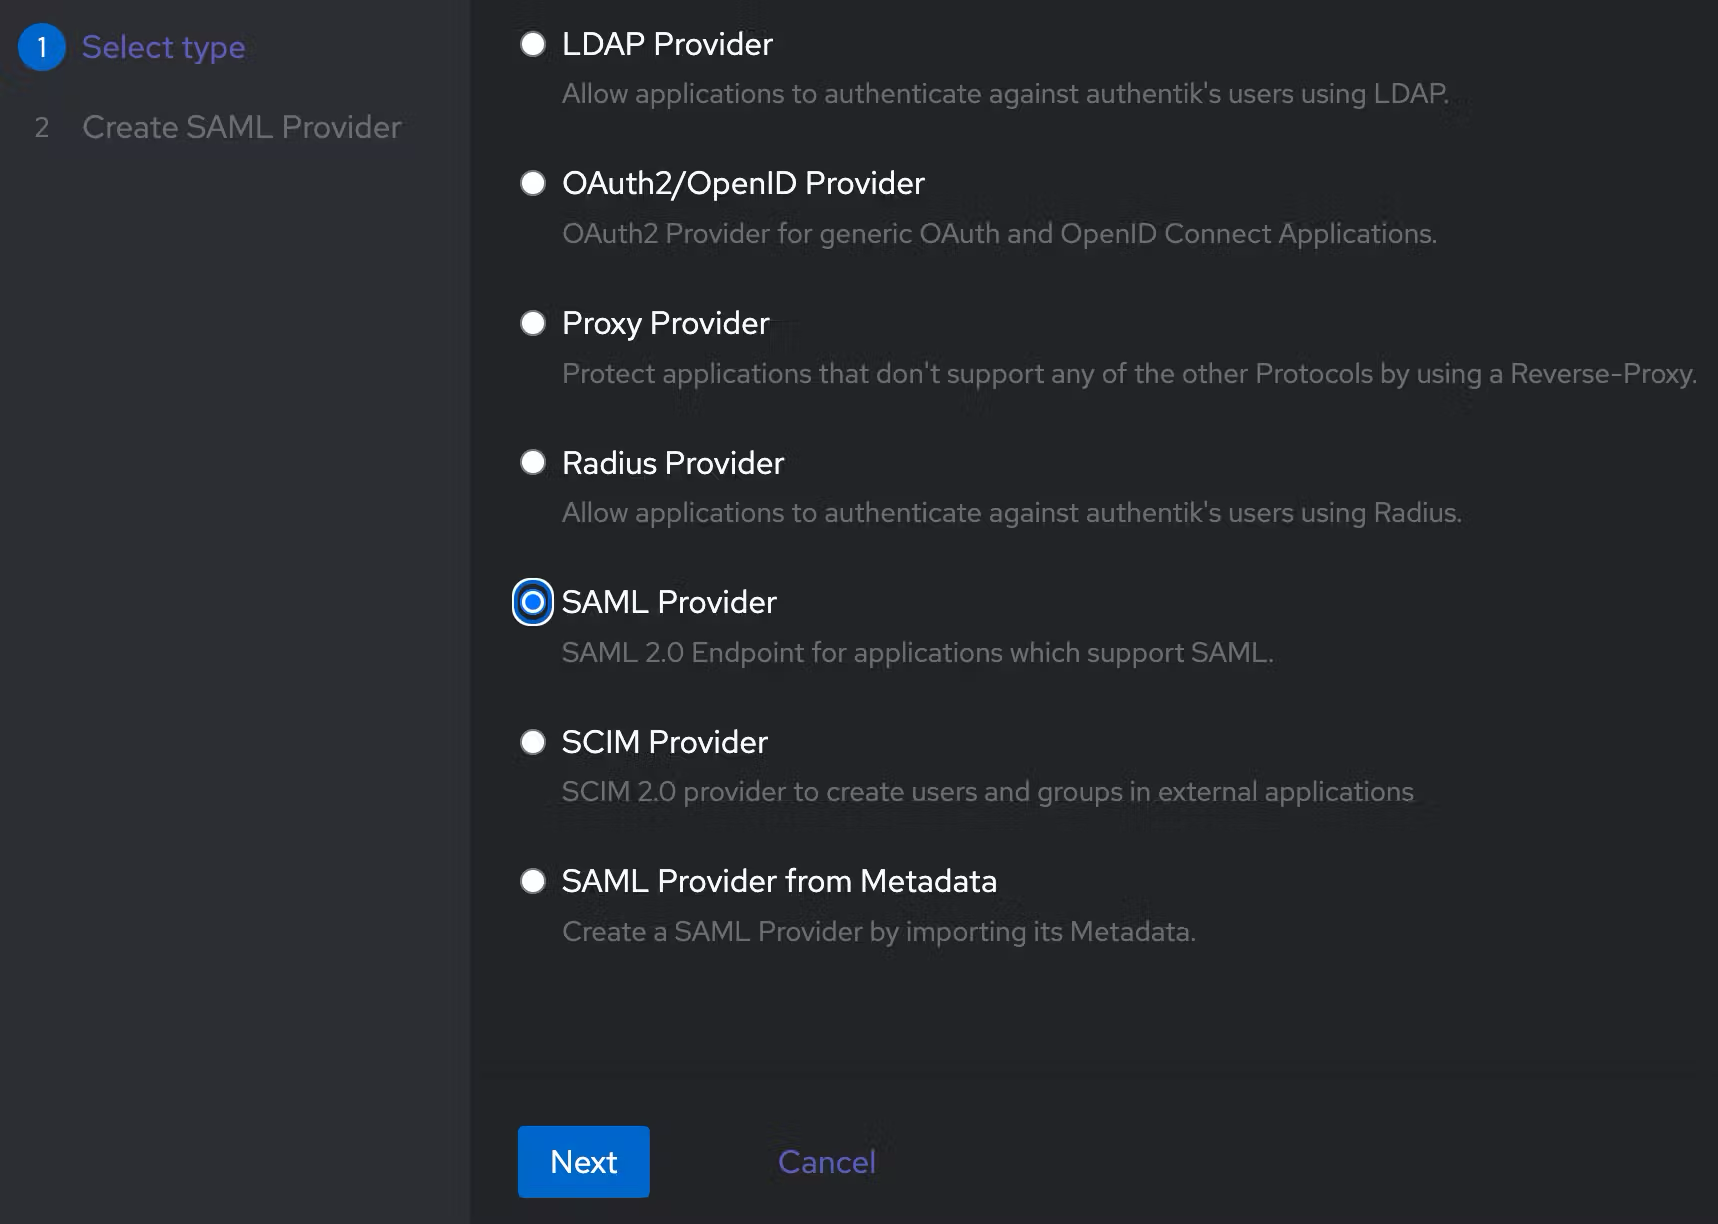
Now add a SAML provider - you can find the options under Applications -> Providers
Select SAML Provider and click Next
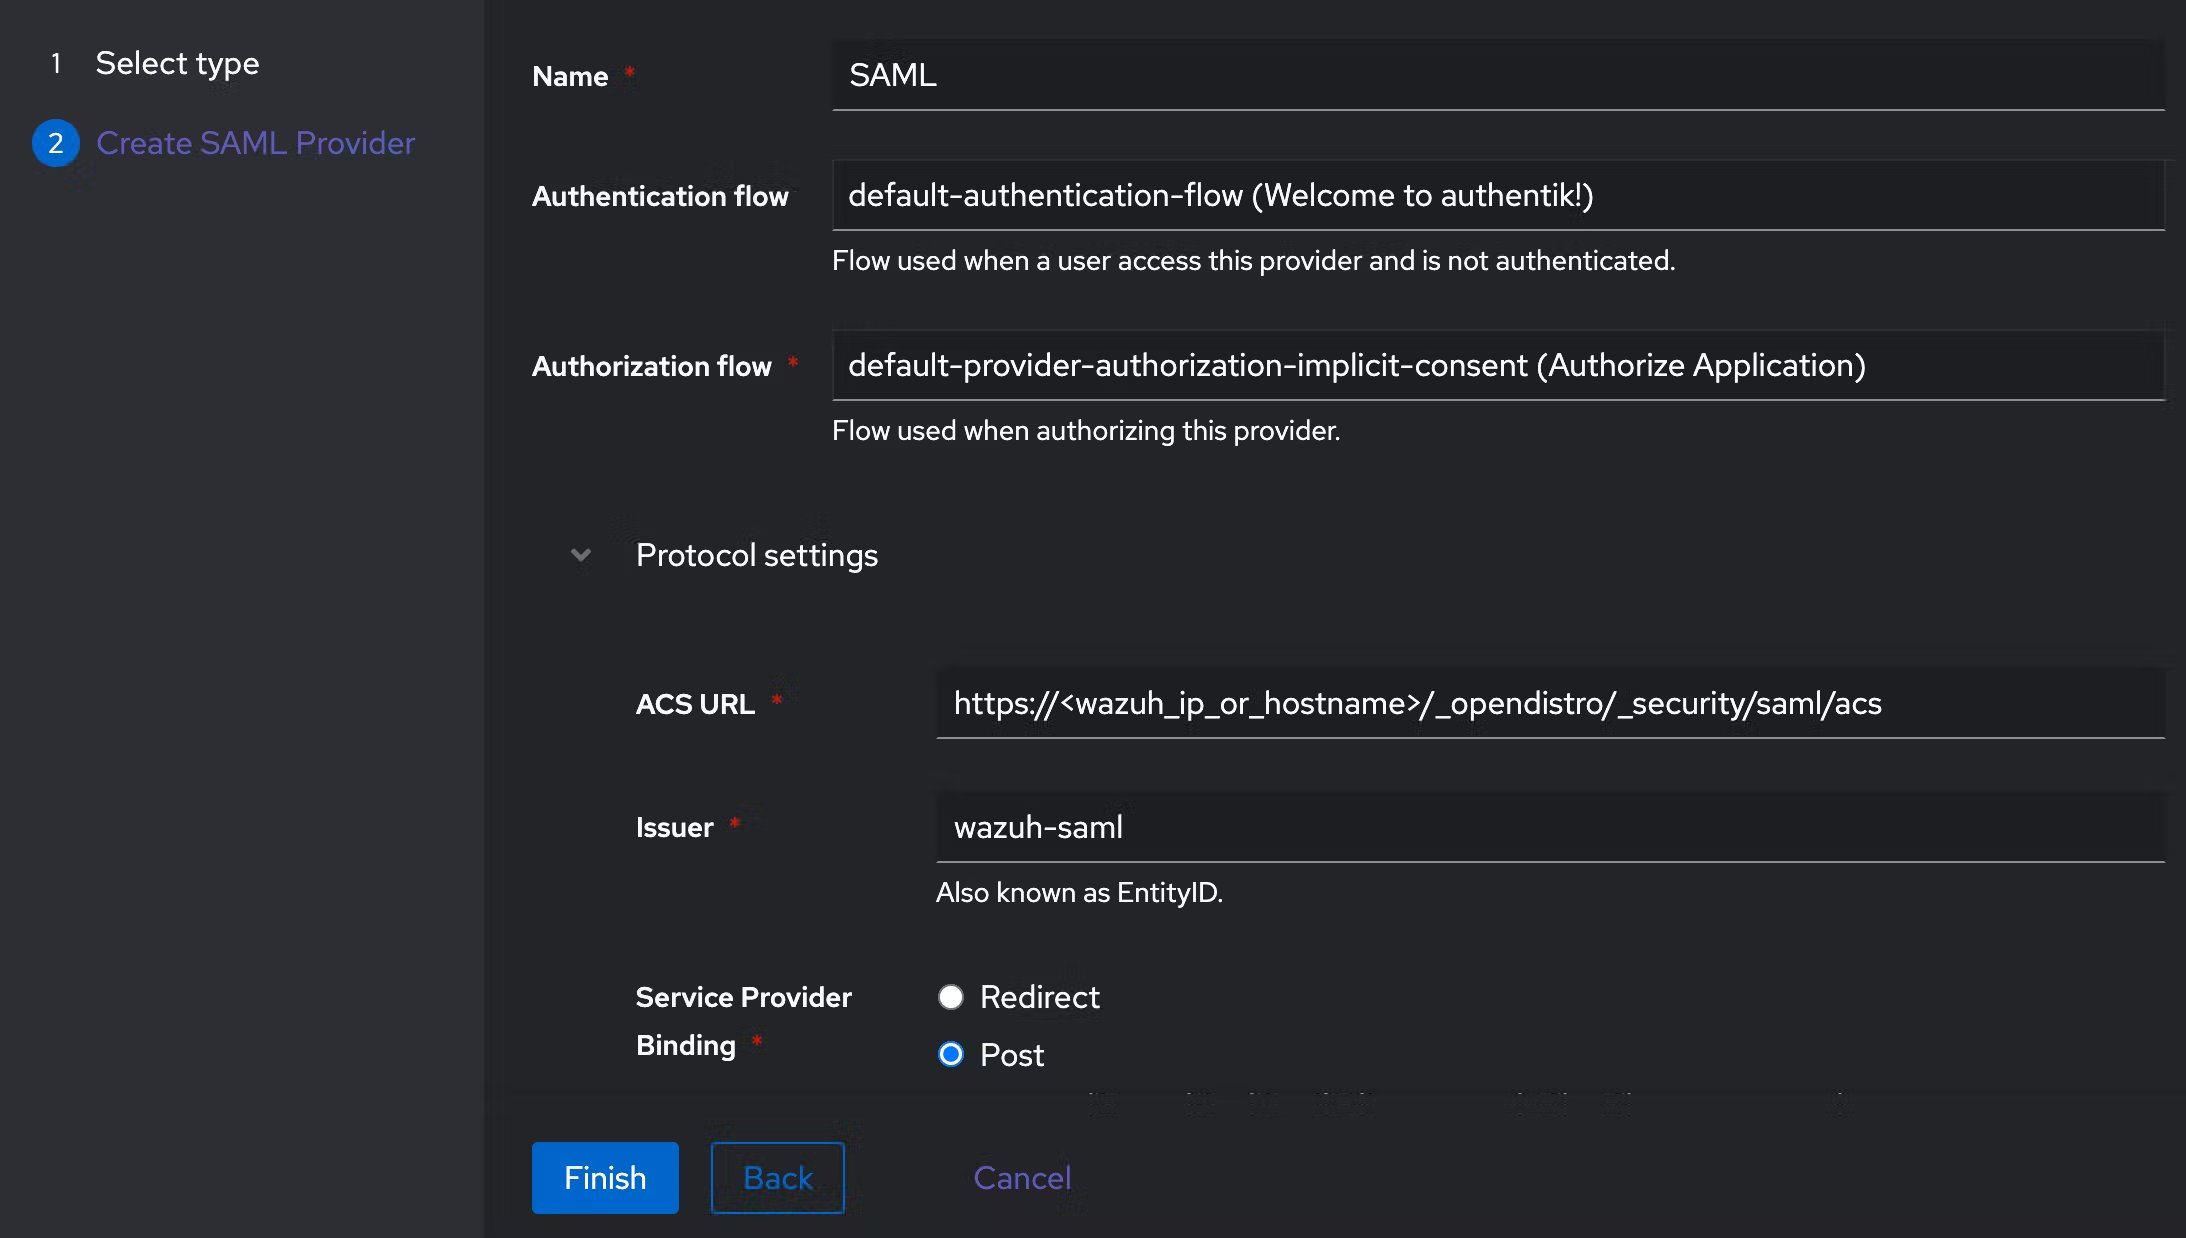
Add a descriptive name, select the appropriate Authentication/Authorization flow, adjust the ACS URL to contain the IP/hostname of your wazuh installation and add /_opendistro/_security/saml/acs to the end.
https://<WAZUH_IP_OR_HOSTNAME>/_opendistro/_security/saml/acs
Also make sure to give it an appropriate EntityID name (issuer), you will need that later and a valid option is e.g. wazuh-saml
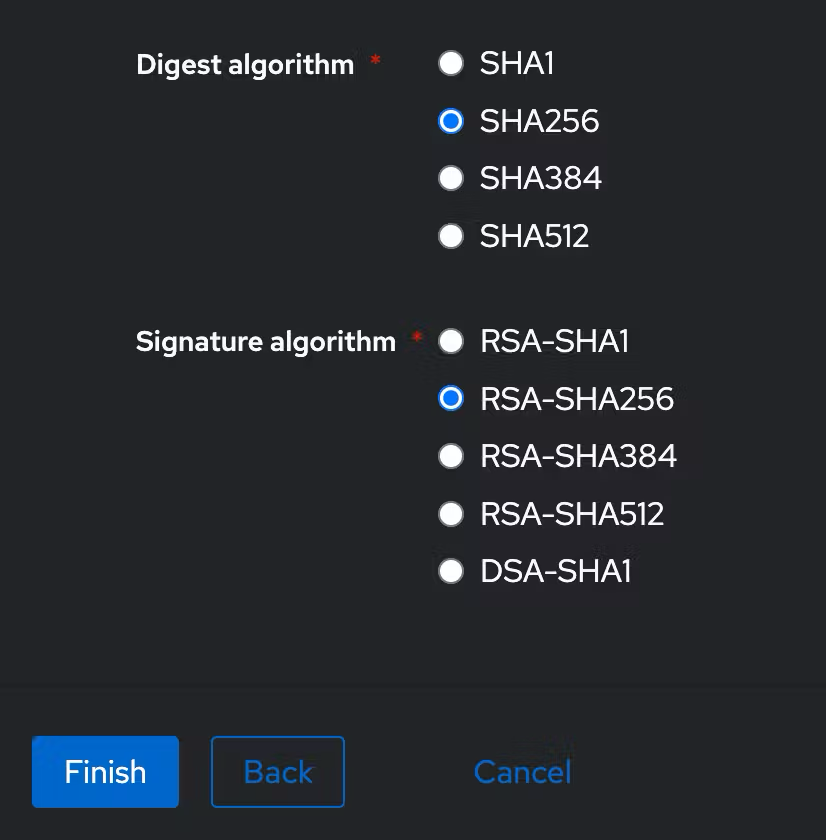
Select Post as the Service Provider Binding and move on to the advanced protocol settings.
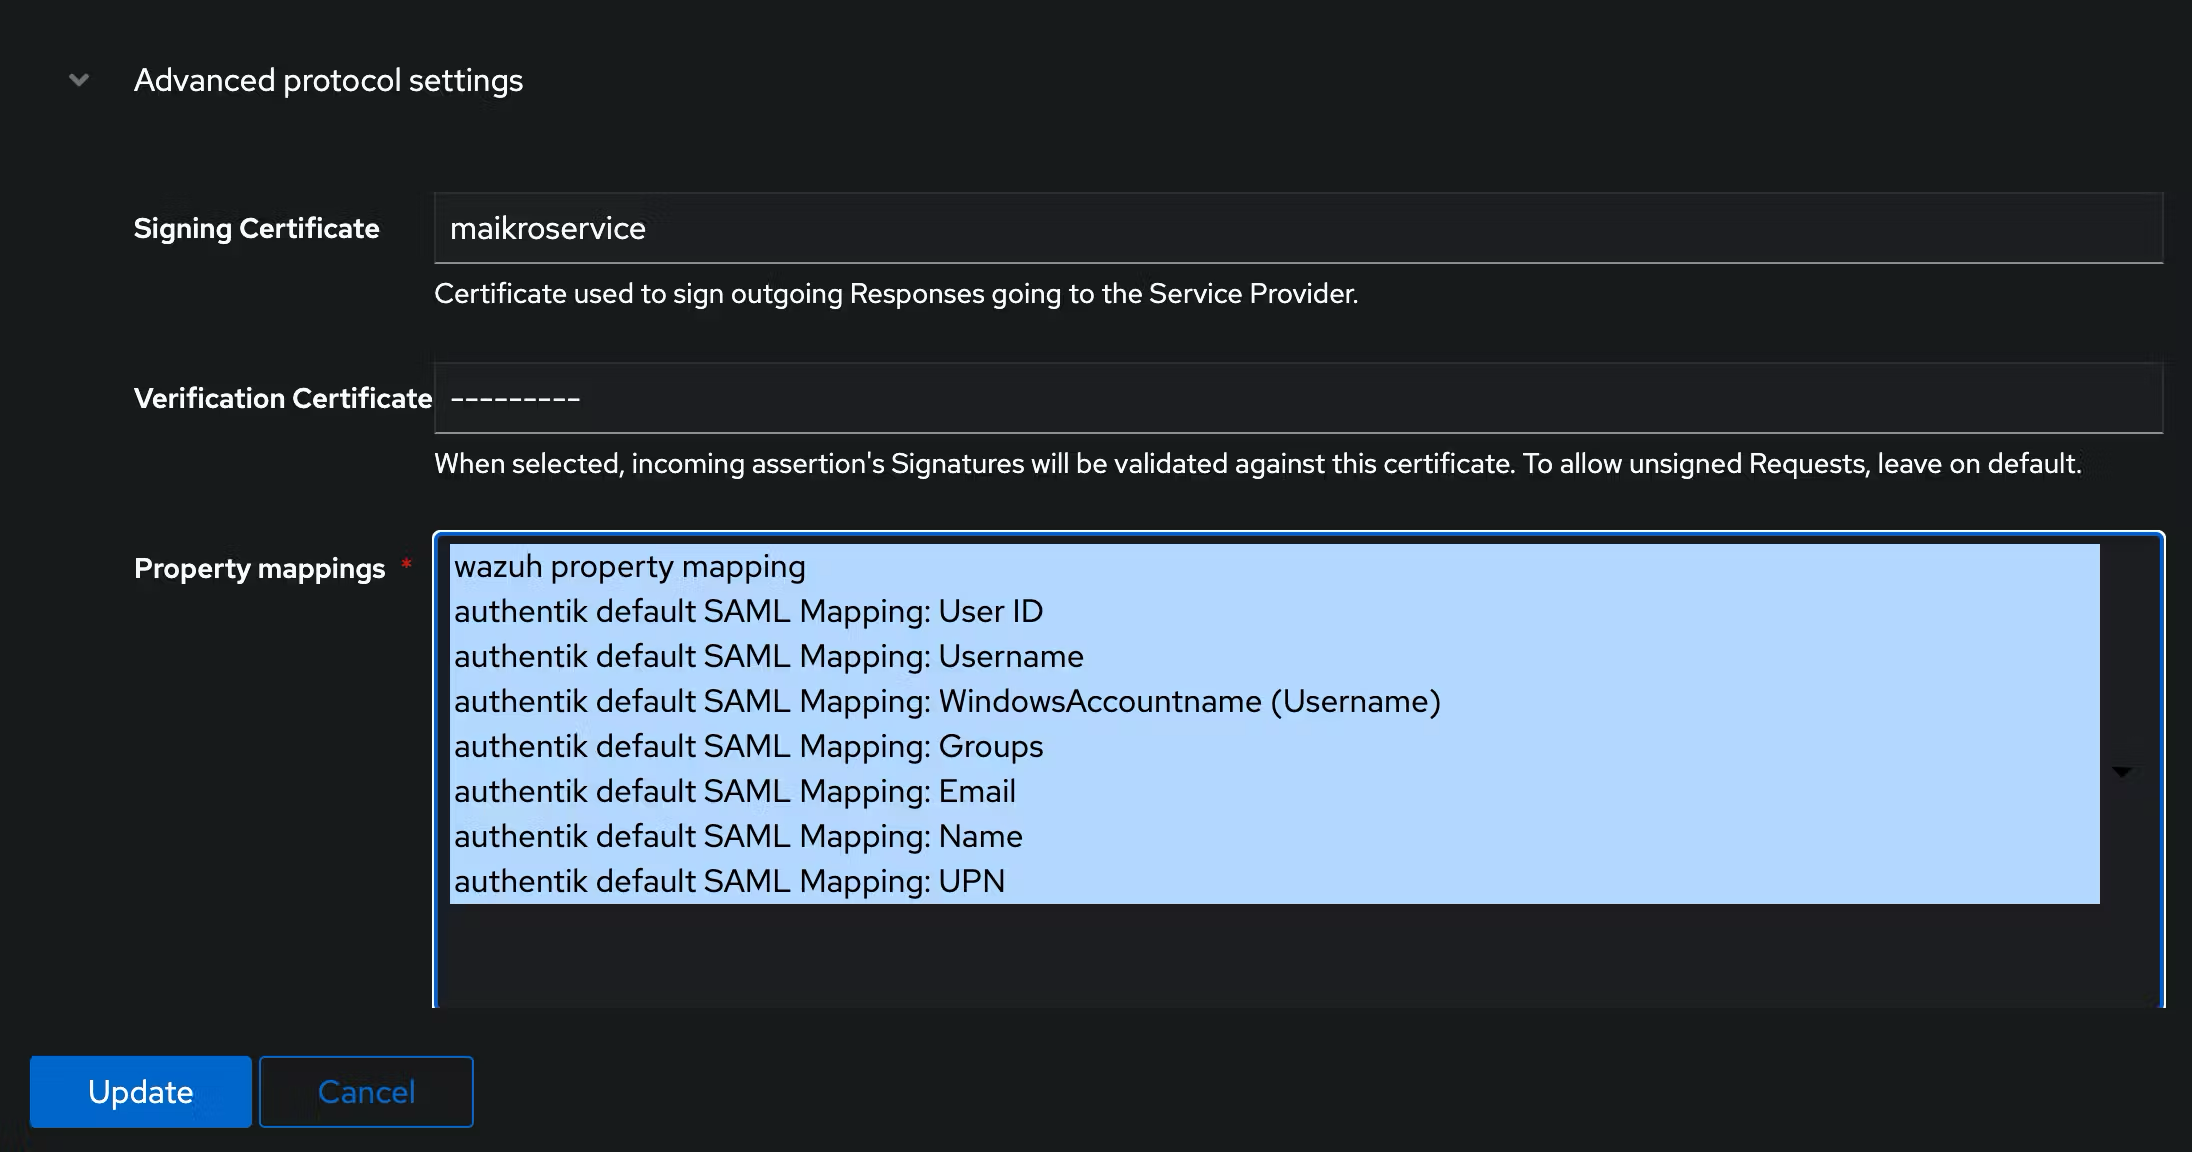
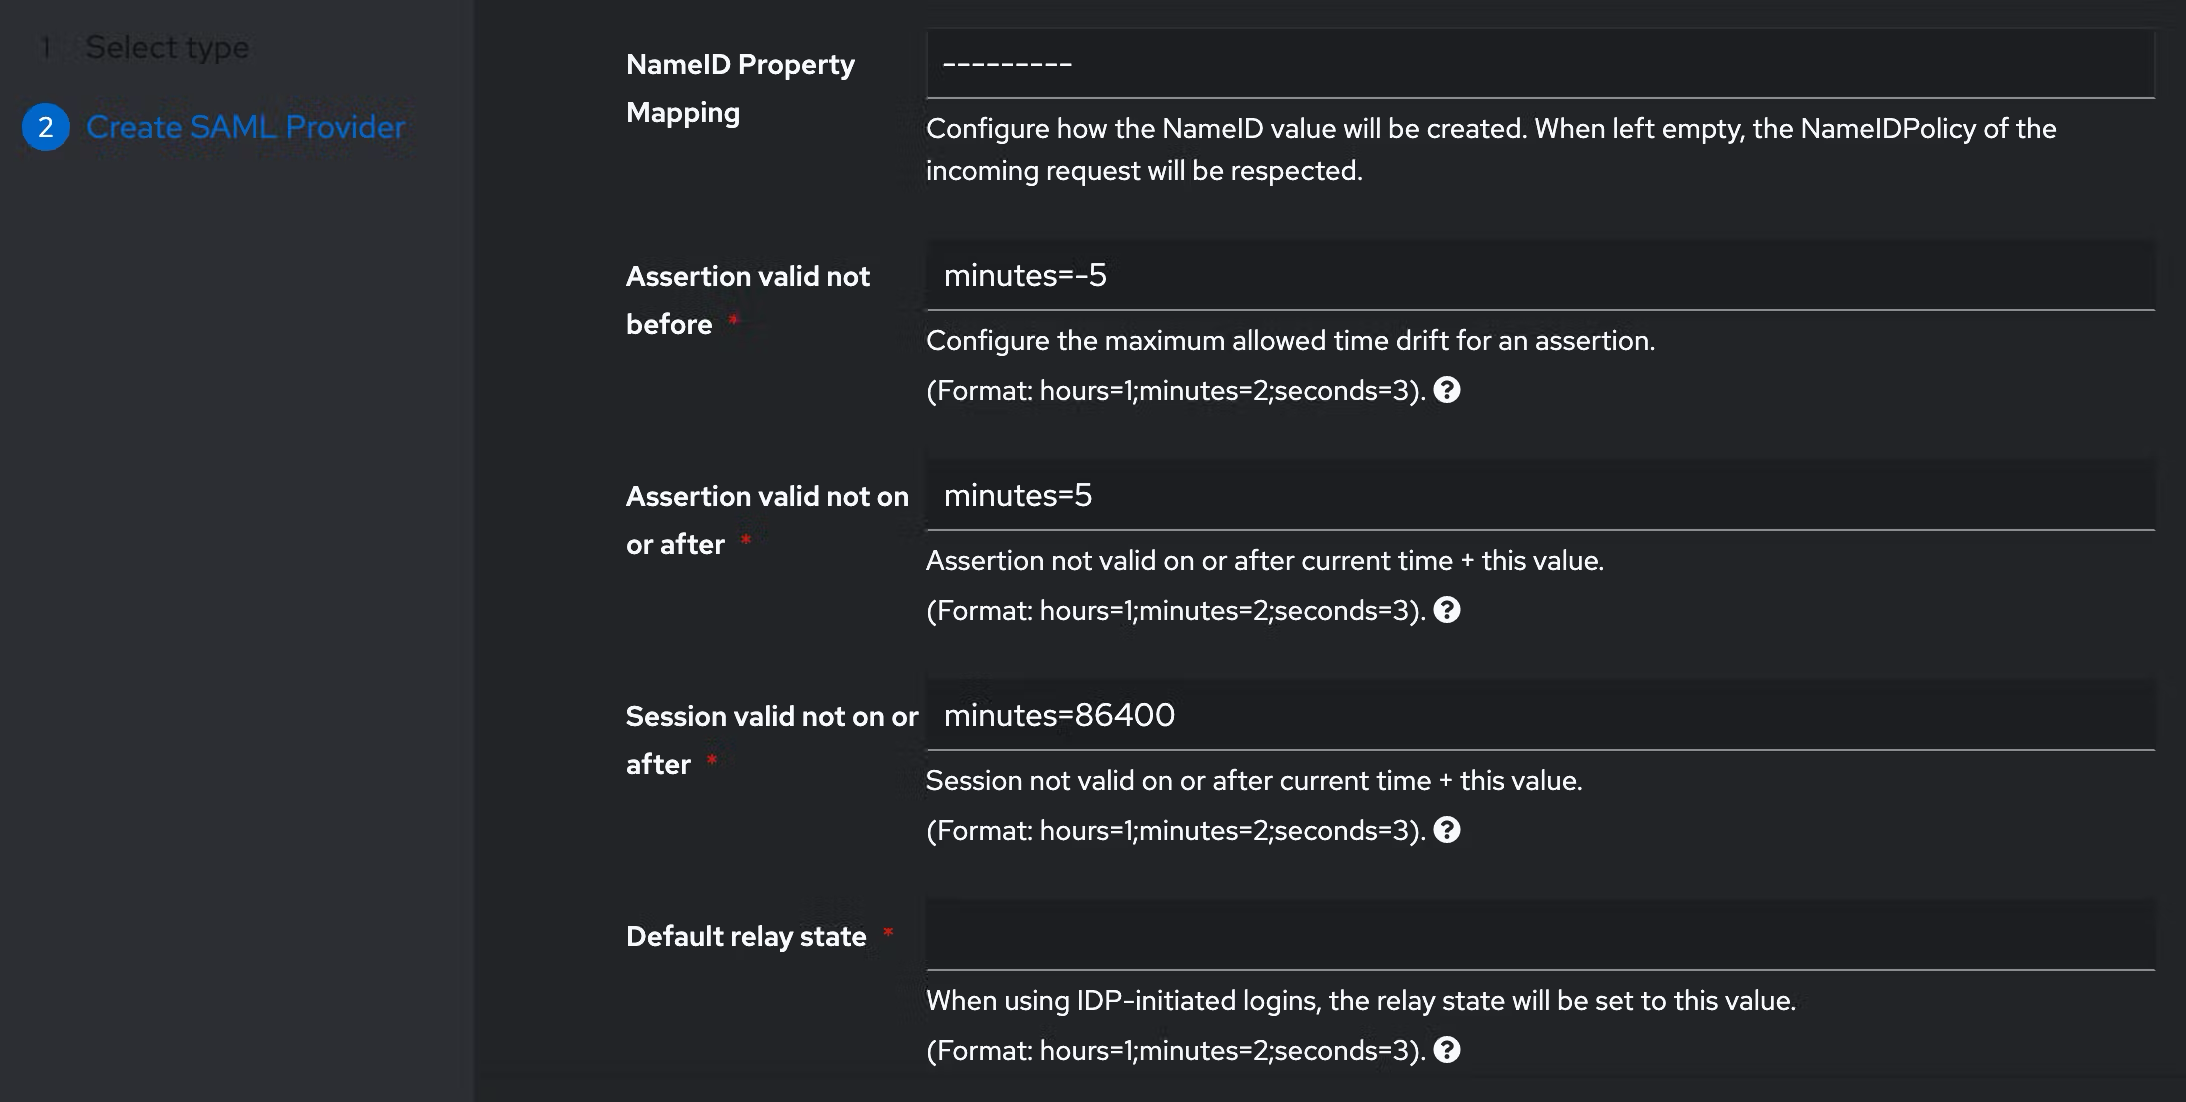
The last step is to select the previously created Signing Certificate from the dropdown list and leave the rest of the configurations as default for now.
Step 3 - property mapping
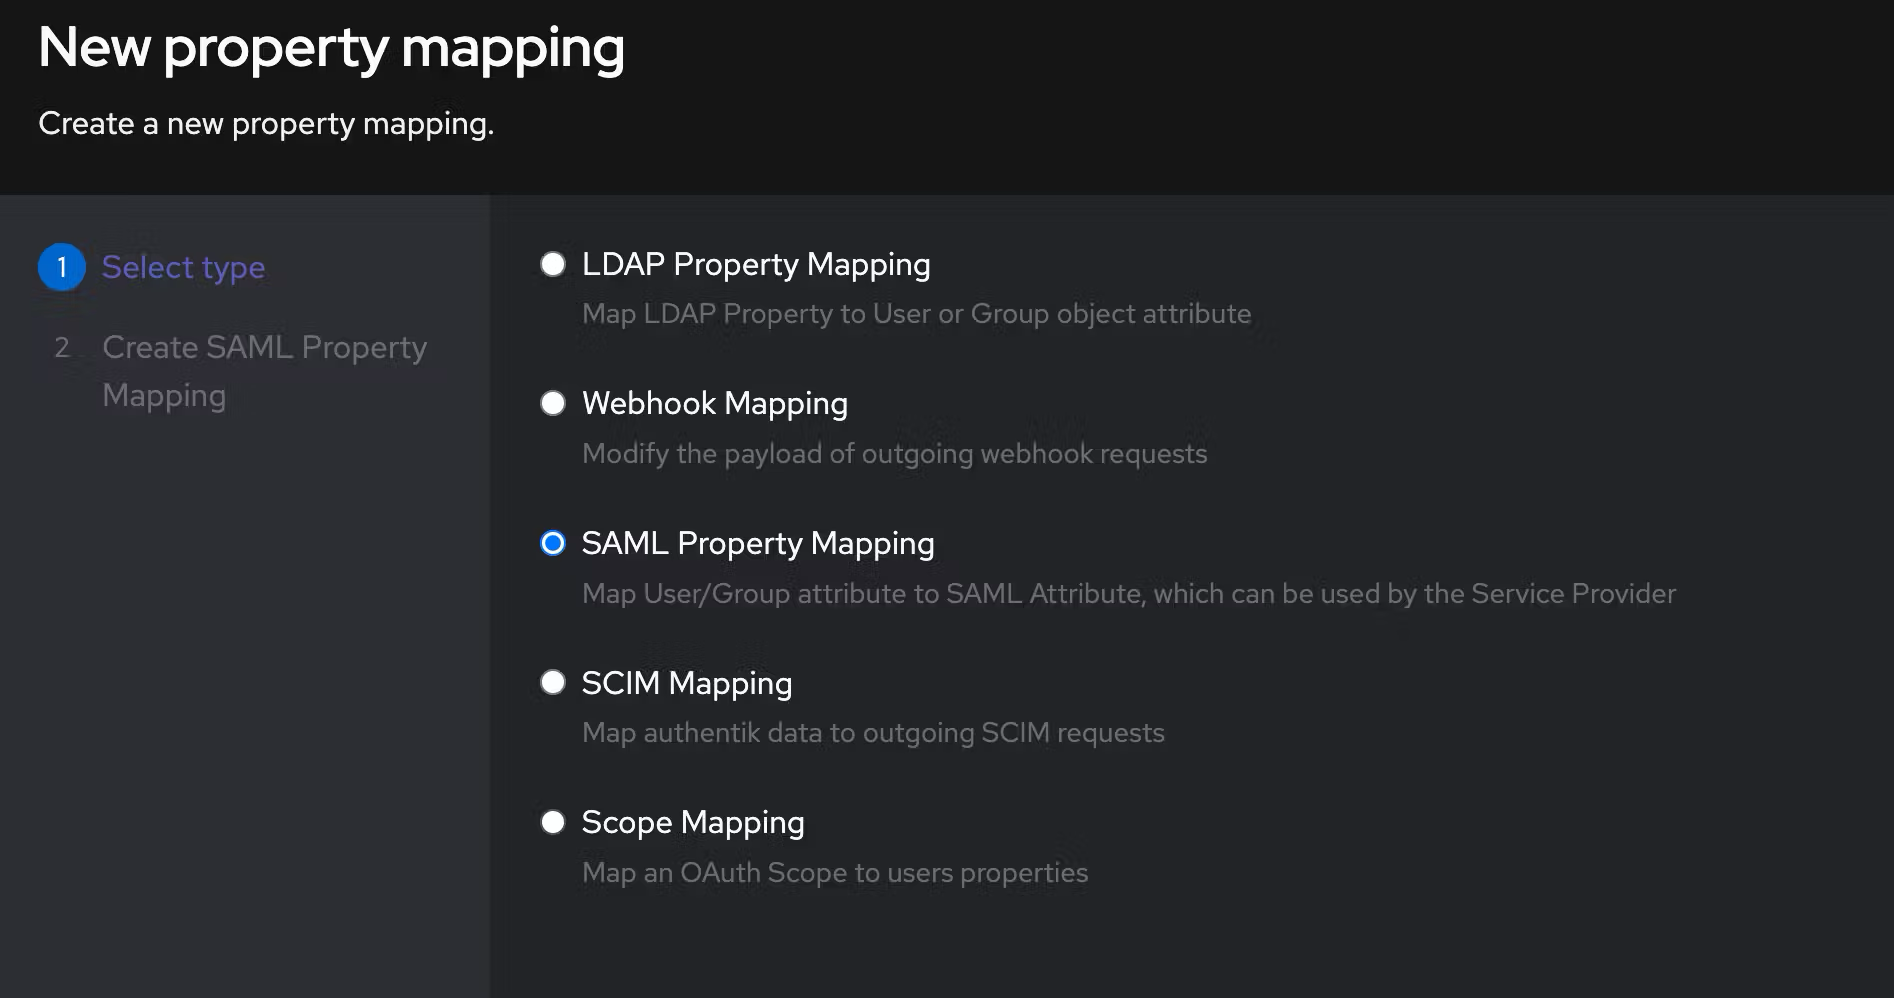
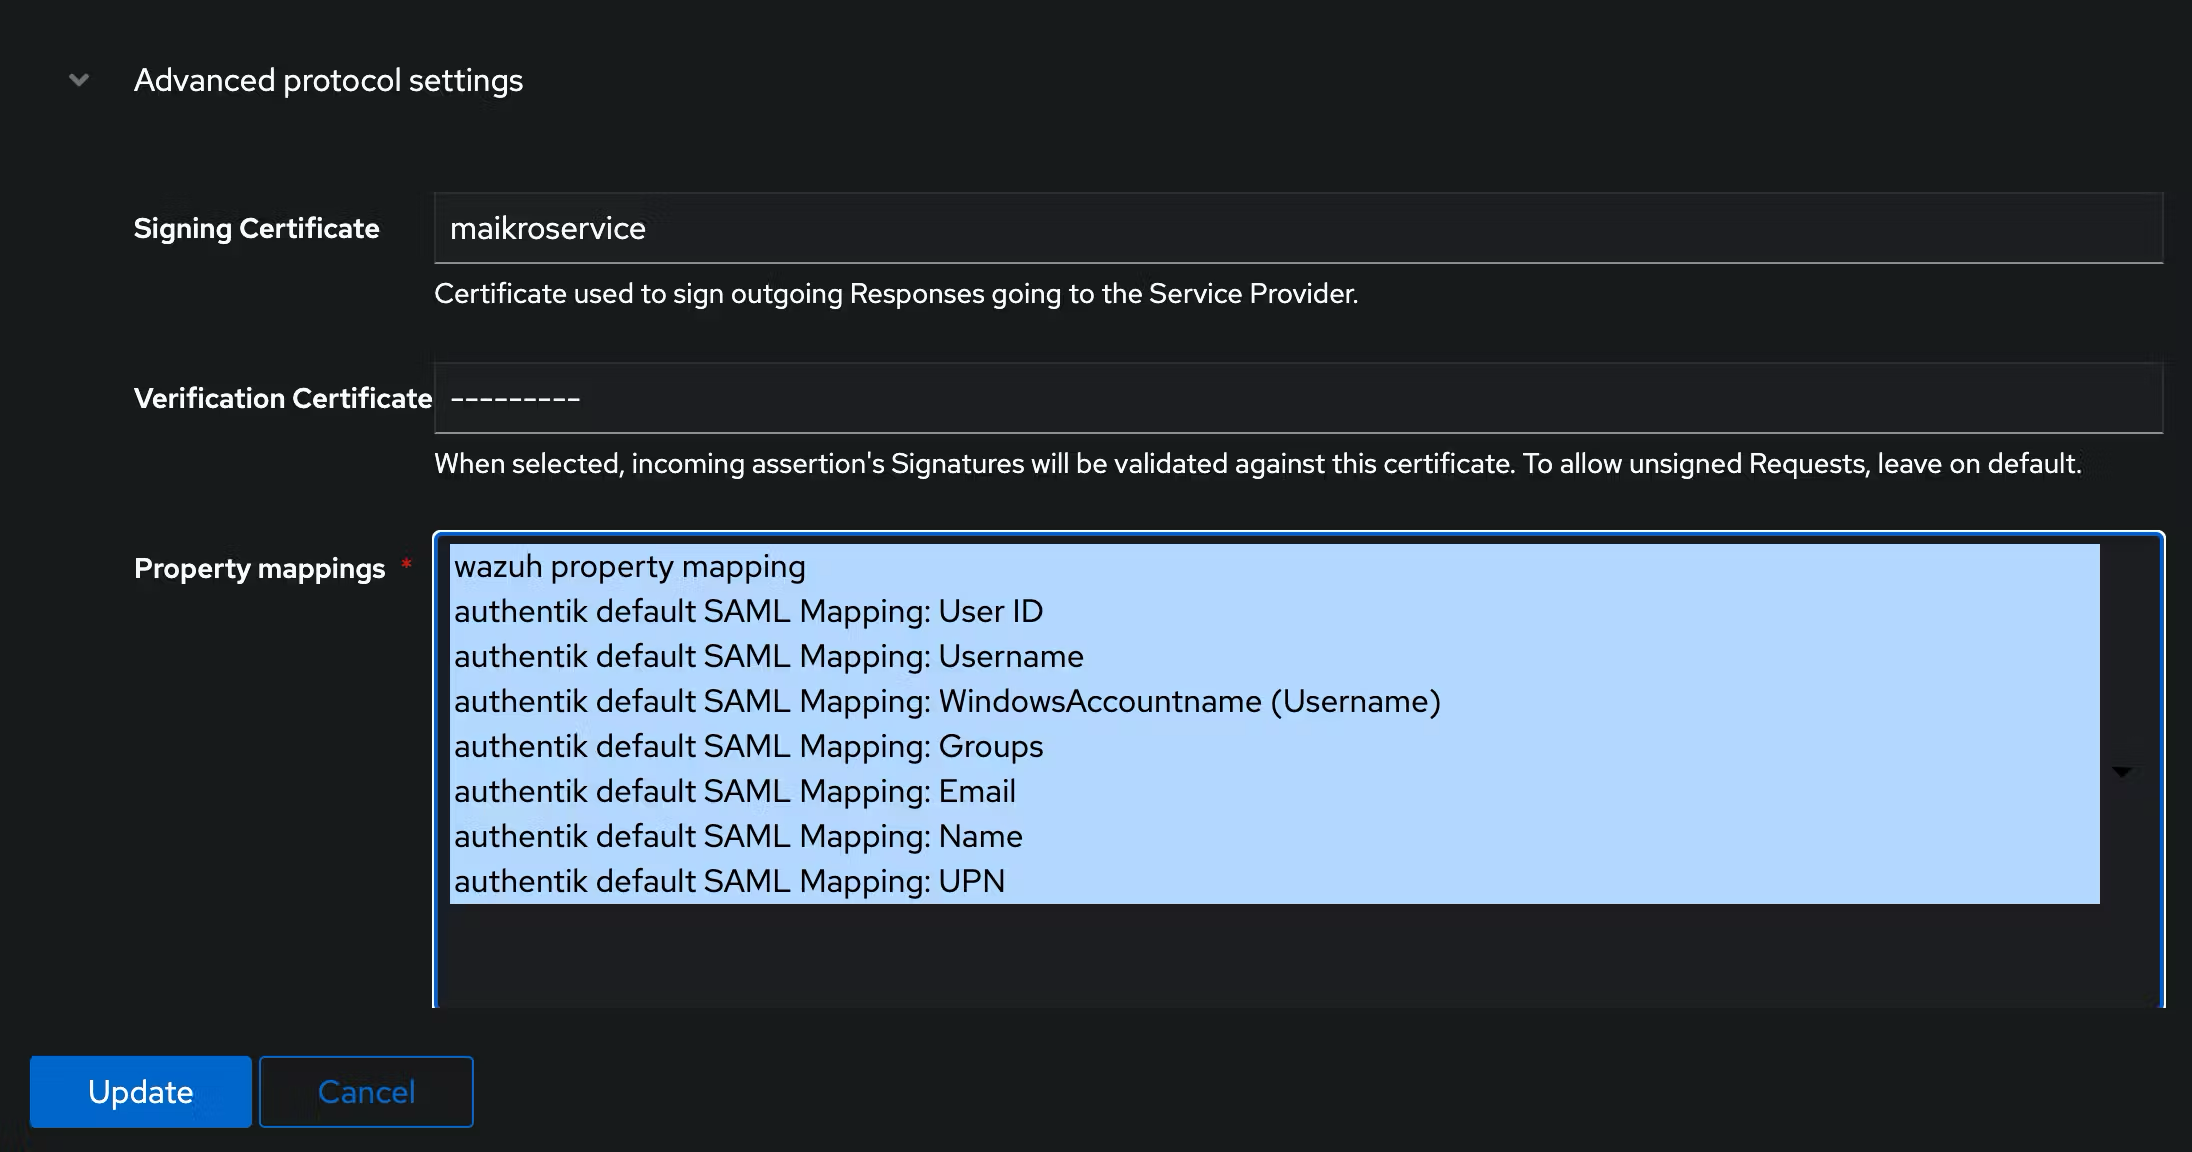
Time to create a Property Mapping - this is a custom function that takes group/user data from authentik and provides it to wazuh in a structured way.
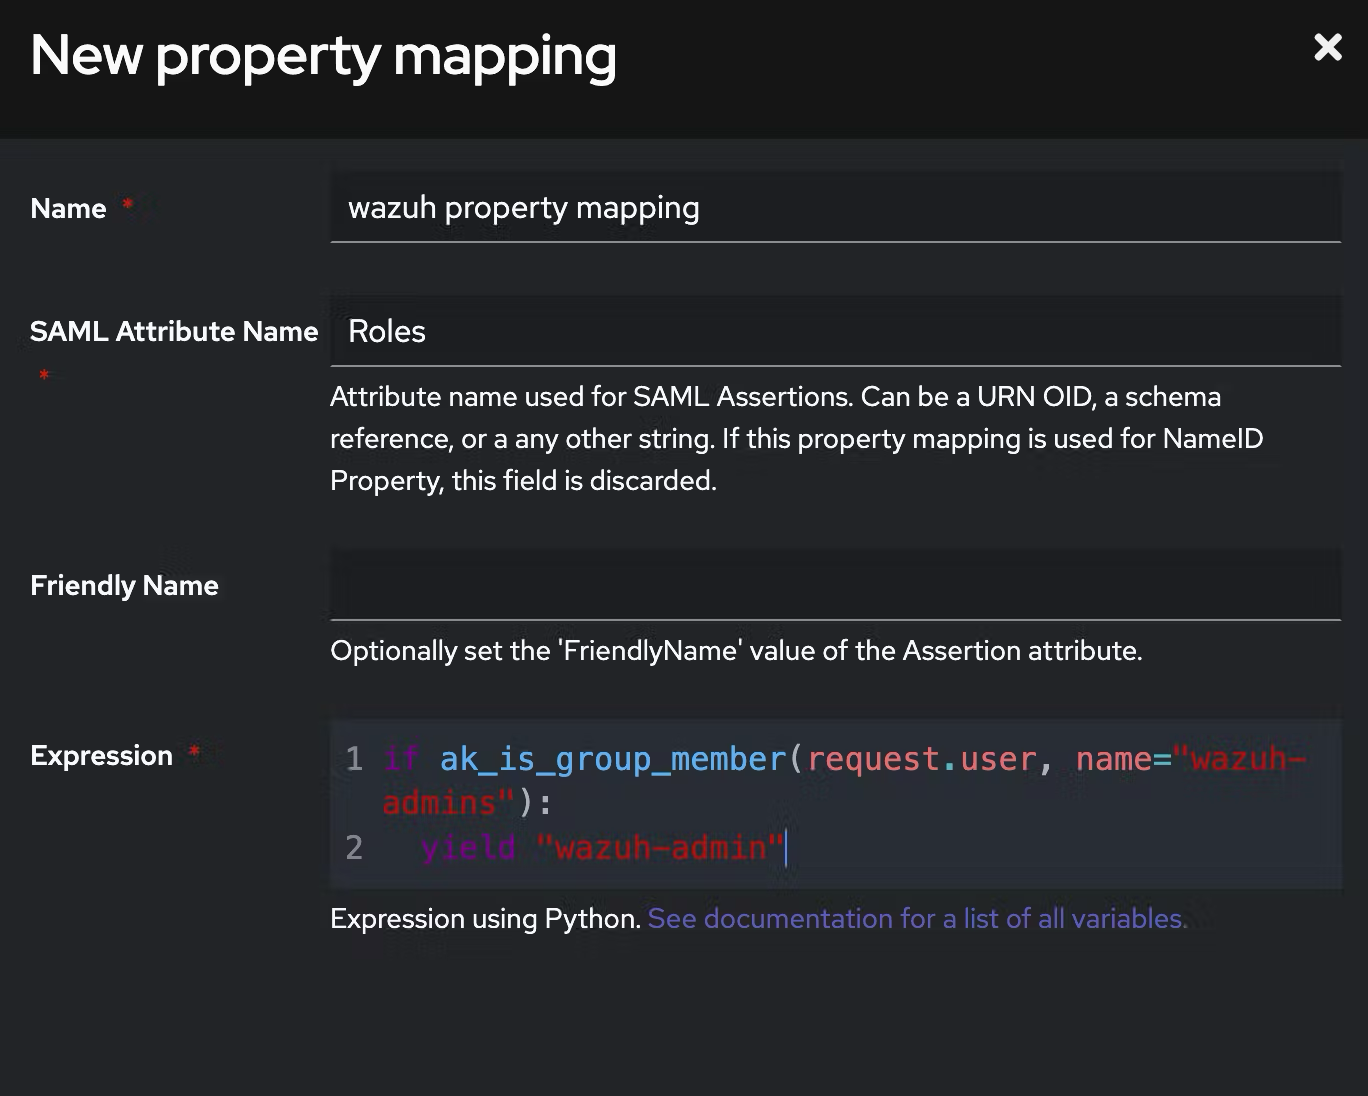
We will map a group membership - wazuh-admins - as a backend role for RBAC in wazuh using Property Mapping - Customization -> Property Mappings
Name: wazuh property mapping
SAML Attribute Role: Roles
if ak_is_group_member(request.user, name="wazuh-admins"):
  yield "wazuh-admin"
Make sure to adjust the provider to include the newly created property mapping in the Advanced protocol settings.
Step 4 - SAML application
Now create an application to use the newly created provider. Applications -> Applications -> Create
Name: wazuh-saml
Slug: wazuh-saml
Provider: SAML
Policy Engine: any
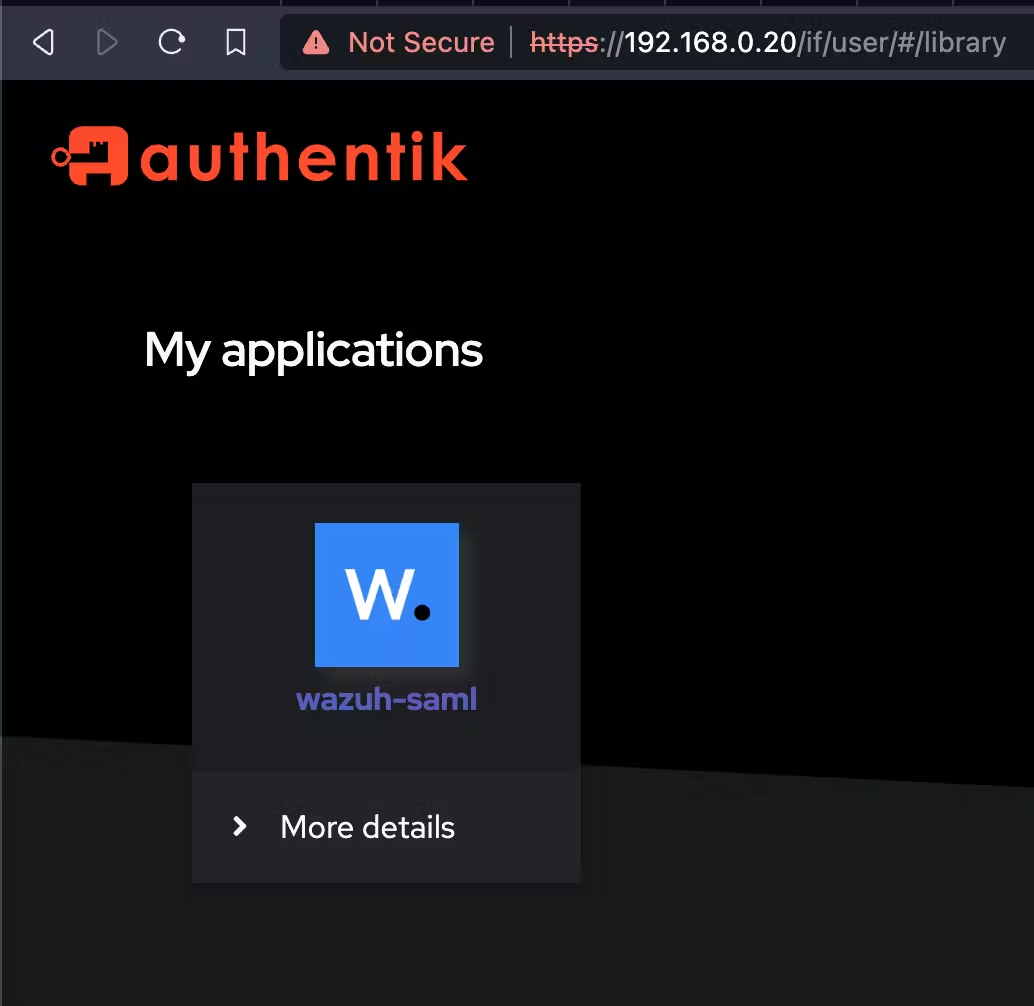
You can change the UI and upload a logo so that in the Applications overview you have a nice layout and can easily identify the new wazuh app.
Step 5 - metadata + wazuh opensearch-security configuration
Now download the metadata file saml_authentik_meta.xml from the Applications -> Provider -> Download in the bottom left corner

and copy/save it on the wazuh server - ideally under /etc/wazuh-indexer/opensearch-security/idp-metadata.xml
Next up change the /etc/wazuh-indexer/opensearch-security/config.yml and make sure it looks like the one below:
- you need to adjust the
metadata_fileif your name differs from the one shown above/below entity_idneeds to change twice, once in theidpsection and once in thespsection - you can look it up in the metadata xml file - search forentityID
- adapt the
kibana_urlto match your wazuh dashboard url - e.g.https://wazuh.myhomelab.com/ - copy/paste the
exchange_key, you can get it from the metadata file (find the key between the<ds:X509Certificate></ds:X509Certificate>tags, it usually starts with MII...) - DO NOT FORGET TO PUT QUOTES AROUND THE CERTIFICATE - make sure to adjust the ownership and access rights via the following commands:
sudo chown wazuh-indexer:wazuh-indexer /etc/wazuh-indexer/opensearch-security/idp-metadata.xml

sudo chmod 640 /etc/wazuh-indexer/opensearch-security/idp-metadata.xml
authc:
  basic_internal_auth_domain:
    description: "Authenticate via HTTP Basic + SAML against internal users database"
    http_enabled: true
    transport_enabled: true b
    order: 0
    http_authenticator:
      type: basic
      challenge: false
    authentication_backend:
      type: intern
  saml_auth_domain:
    http_enabled: true
    transport_enabled: false
    order: 1
    http_authenticator:
      type: saml
      challenge: true
      config:
        idp:
          metadata_file: "/etc/wazuh-indexer/opensearch-security/idp-metadata.xml"
          entity_id: "wazuh-saml"
        sp:
          entity_id: "wazuh-saml"
        kibana_url: "https://<YOUR_WAZUH_IP_OR_HOSTNAME>"
        roles_key: Roles
        exchange_key: "MIIGIODCCA+ygAwIBAgITREIpdNn++usuy4Gq5g0W2/SQs..."
     authentication_backend:
       type: noop
Step 6 - securityadmin.sh
After you save the config.yml you need to restart the wazuh manager and tell it to load the modified file - this can be done automagically using the securityadmin.sh file that wazuh provides with the following command:
export JAVA_HOME=/usr/share/wazuh-indexer/jdk/ && bash /usr/share/wazuh-indexer/plugins/opensearch-security/tools/securityadmin.sh -f /etc/wazuh-indexer/opensearch-security/config.yml -icl -key /etc/wazuh-indexer/certs/admin-key.pem -cert /etc/wazuh-indexer/certs/admin.pem -cacert /etc/wazuh-indexer/certs/root-ca.pem -h localhost -nhnv
If all goes well, Done with success displays.
Step 7 - roles_mapping.yml
In order to map the backend roles from authentik to wazuh-specific roles you need to modify the /etc/wazuh-indexer/opensearch-security/roles_mapping.yml file.
Open the file and scroll to the following section:
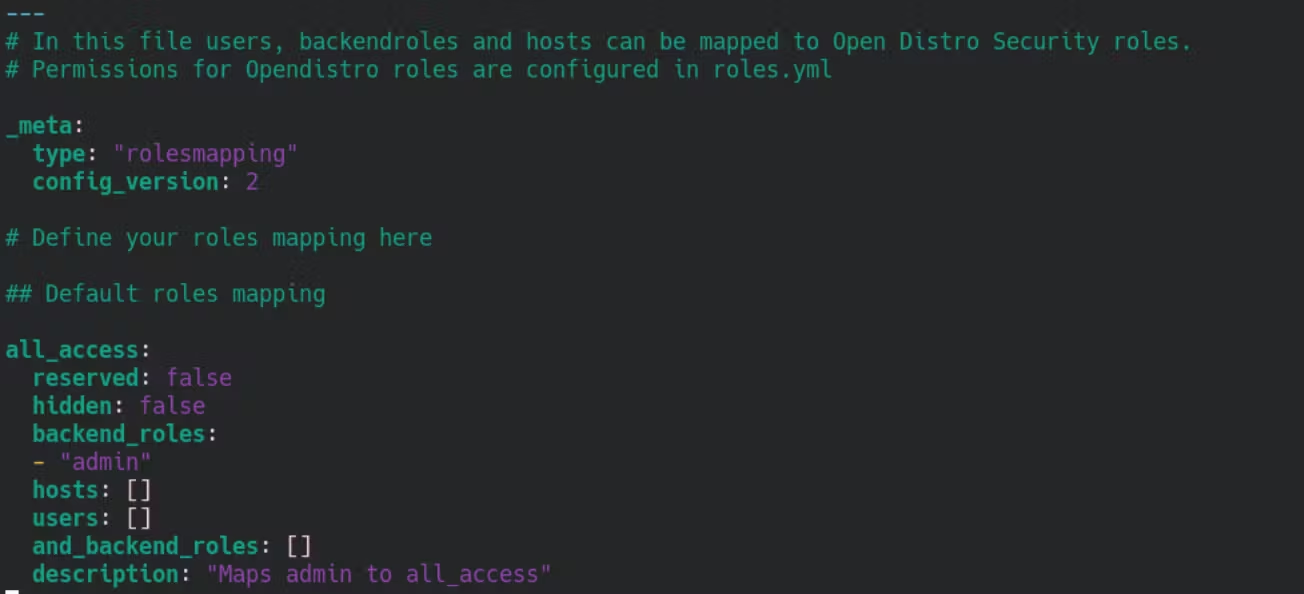
under backend_roles add wazuh-admin and check that reserved is false + the rest looks like below:
all_access:
    reserved: false
    hidden: false
    backend_roles:
        - "wazuh-admin"
        - "admin"
    hosts: []
    users: []
    and_backend_roles: []
    description: "Maps admin to all_access"
Save the file and use the securityadmin.sh file with the following command to load the adjusted roles_mapping.yml:
export JAVA_HOME=/usr/share/wazuh-indexer/jdk/ && bash /usr/share/wazuh-indexer/plugins/opensearch-security/tools/securityadmin.sh -f /etc/wazuh-indexer/opensearch-security/roles_mapping.yml -icl -key /etc/wazuh-indexer/certs/admin-key.pem -cert /etc/wazuh-indexer/certs/admin.pem -cacert /etc/wazuh-indexer/certs/root-ca.pem -h localhost -nhnv
If all goes well, Done with success displays.
Step 8 - wazuh.yml
Check /usr/share/wazuh-dashboard/data/wazuh/config/wazuh.yml and make sure that run_as is set to false.

Step 9 - security role mapping
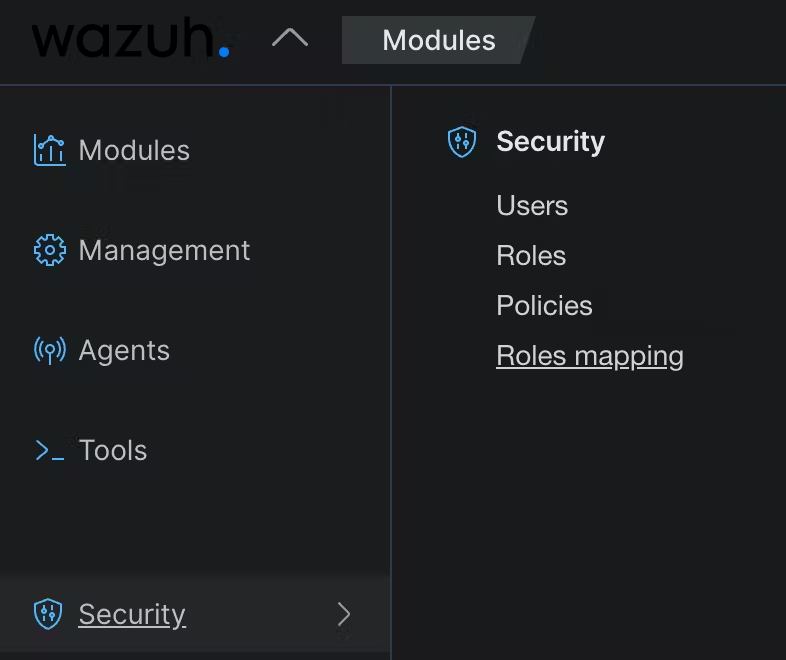
Open the wazuh dashboard, click on the downward pointing triangle next to the wazuh logo, and then click on Security and Roles mapping.
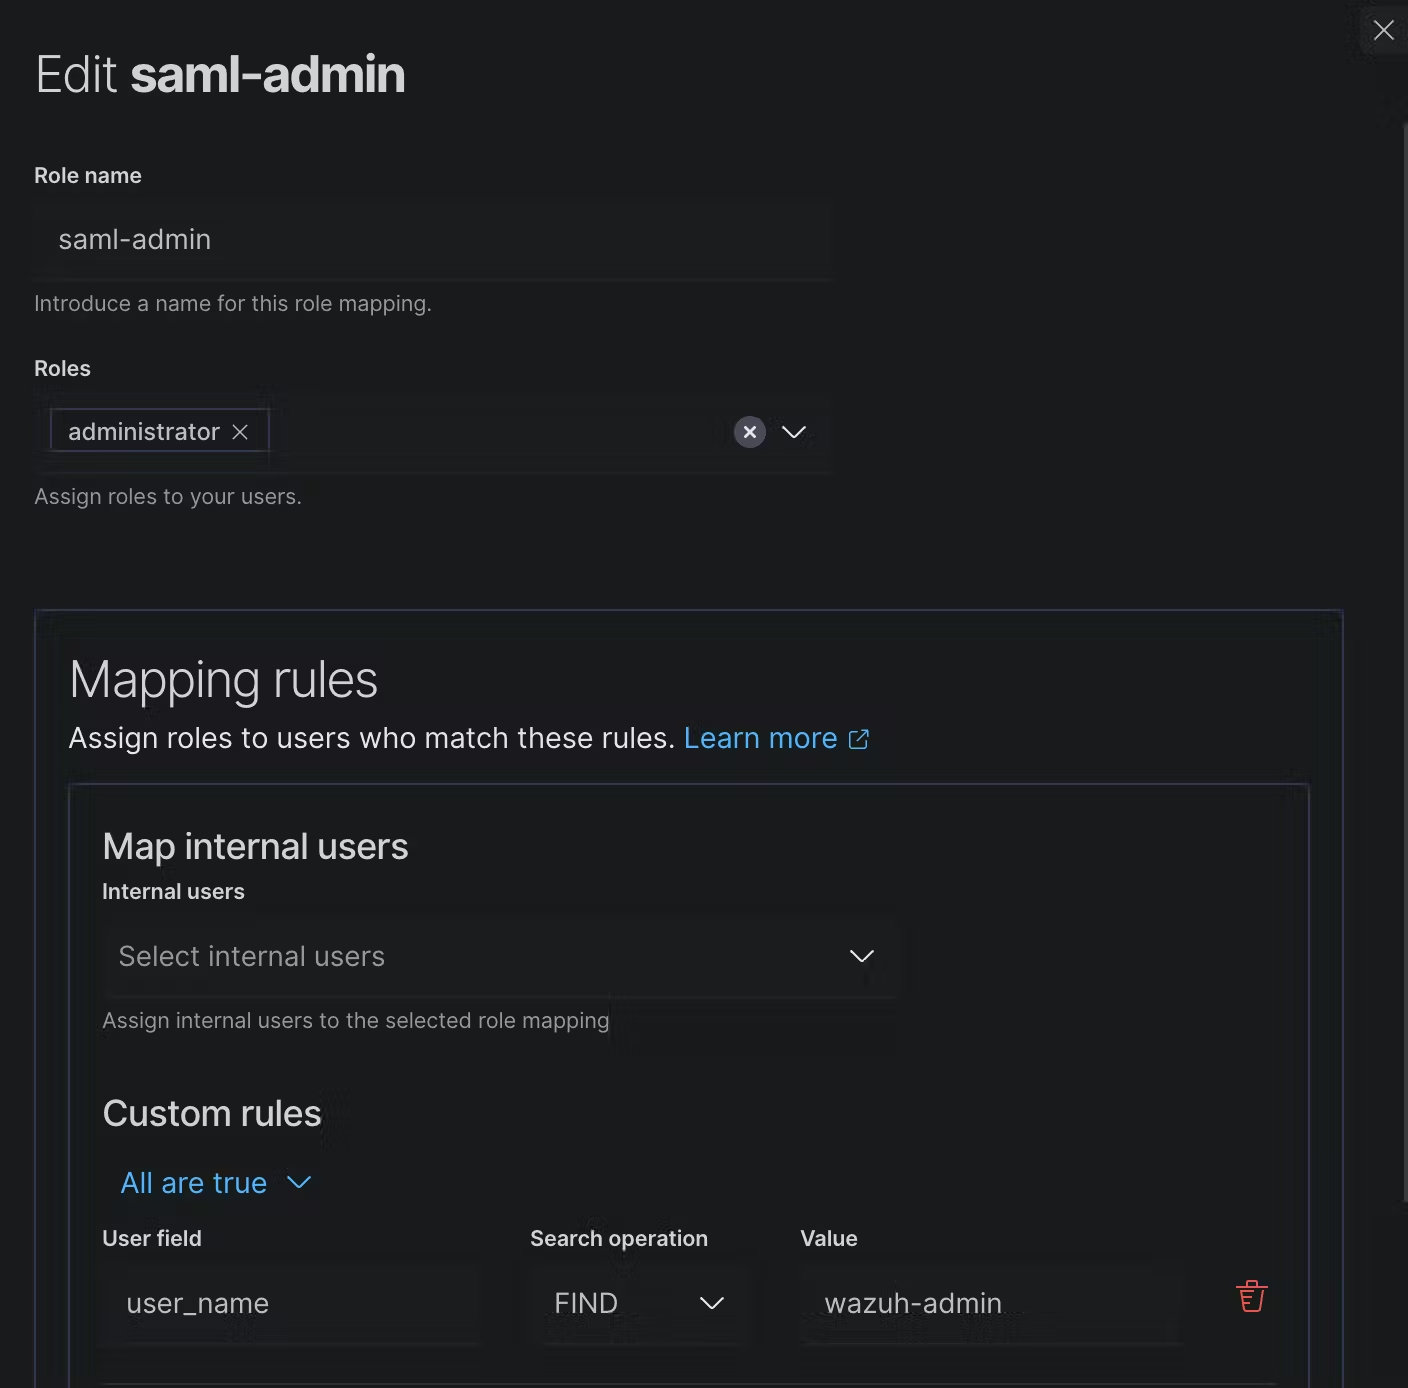
 We will now add a new role mapping. Give it any descriptive name and then add the respective Roles. In this case
 administrator is the name, and add a new custom rule at the bottom that matches (FIND) the user_name to wazuh-admin.
Step 10 - final step - opensearch_dashboards.yml
The last step is to modify /etc/wazuh-dashboard/opensearch_dashboards.yml and add three lines to the bottom of the file:
opensearch_security.auth.type: "saml"
server.xsrf.allowlist:
    [
        "/_opendistro/_security/saml/acs",
        "/_opendistro/_security/saml/logout",
        "/_opendistro/_security/saml/acs/idpinitiated",
    ]
opensearch_security.session.keepalive: false
If all went well you should now only have to restart the wazuh dashboard.
systemctl restart wazuh-dashboard
And then you should be greeted by the authentik login screen when you try to connect to the dashboard.

