2.7 KiB
VMware vCenter Integration
What is vCenter
From https://en.wikipedia.org/wiki/VCenter
!!! note ""
vCenter Server is the centralized management utility for VMware, and is used to manage virtual machines, multiple ESXi hosts, and all dependent components from a single centralized location. VMware vMotion and svMotion require the use of vCenter and ESXi hosts.
!!! warning
This requires passbook 0.10.3 or newer.
!!! warning
This requires VMware vCenter 7.0.0 or newer.
Preparation
The following placeholders will be used:
vcenter.companyis the FQDN of the vCenter server.passbook.companyis the FQDN of the passbook install.
Since vCenter only allows OpenID-Connect in combination with Active Directory, it is recommended to have passbook sync with the same Active Directory.
Step 1
Under Property Mappings, create a Scope Mapping. Give it a name like "OIDC-Scope-VMware-vCenter". Set the scope name to openid and the expression to the following
return {
  "domain": "<your active directory domain>",
}
Step 2
!!! note If your Active Directory Schema is the same as your Email address schema, skip to Step 3.
Under Sources, click Edit and ensure that "Autogenerated Active Directory Mapping: userPrincipalName -> attributes.upn" has been added to your source.
Step 3
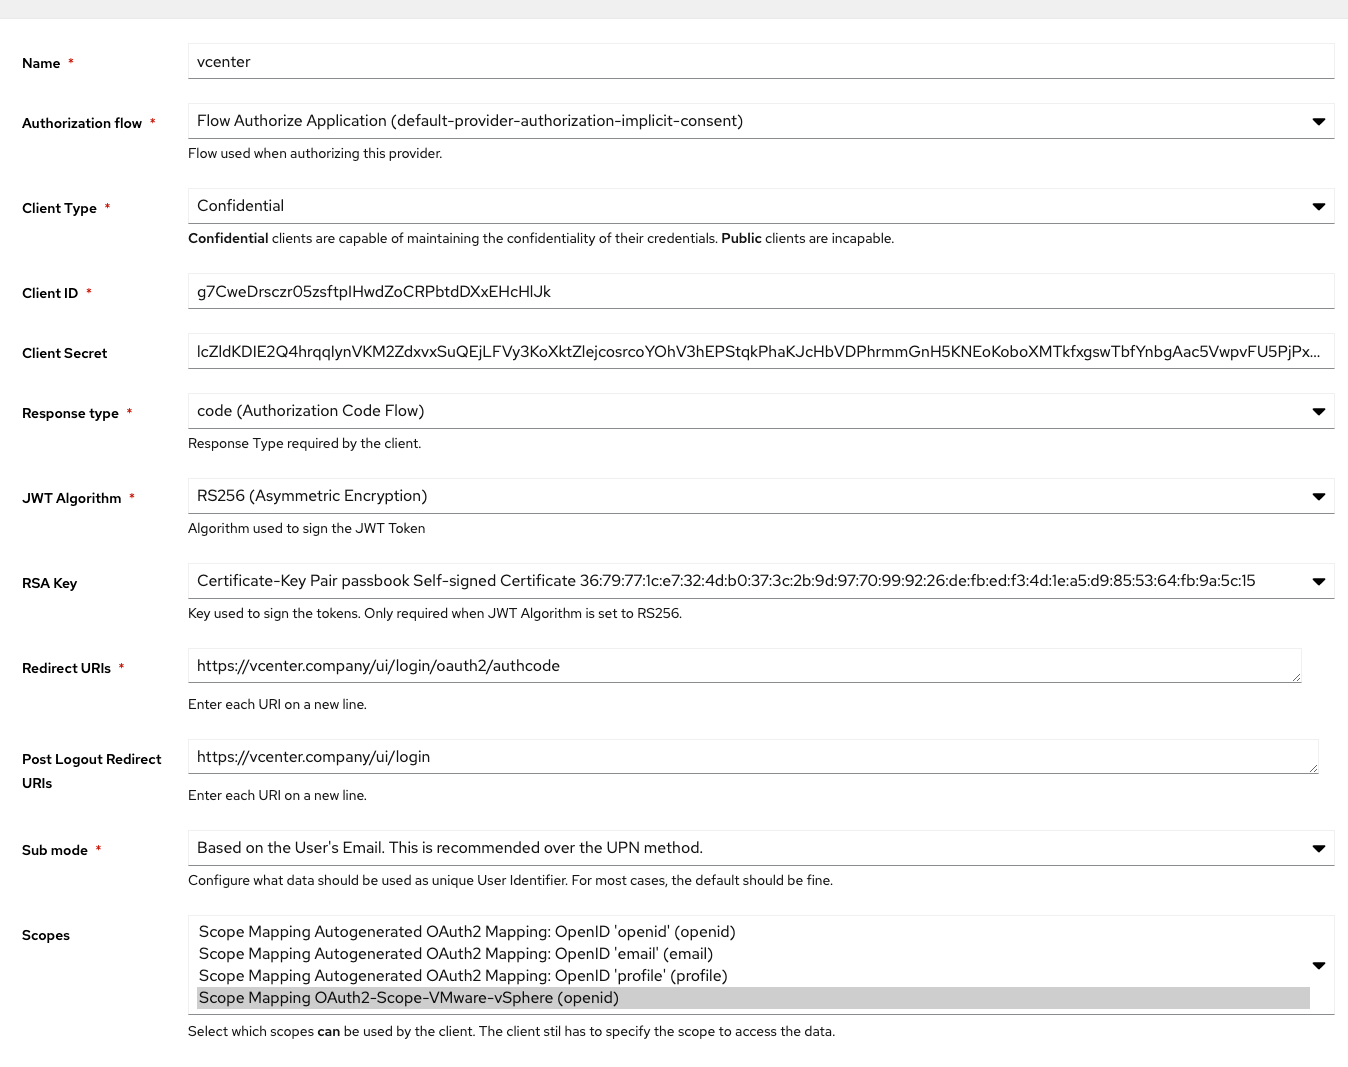
Under Providers, create an OAuth2/OpenID Provider with these settings:
- Client Type: Confidential
- Response Type: code
- JWT Algorithm: RS256
- Redirect URI:
https://vcenter.company/ui/login/oauth2/authcode - Post Logout Redirect URIs:
https://vcenter.company/ui/login - Sub Mode: If your Email address Schema matches your UPN, select "Based on the User's Email...", otherwise select "Based on the User's UPN...".
- Scopes: Select the Scope Mapping you've created in Step 1
Step 4
Create an application which uses this provider. Optionally apply access restrictions to the application.
vCenter Setup
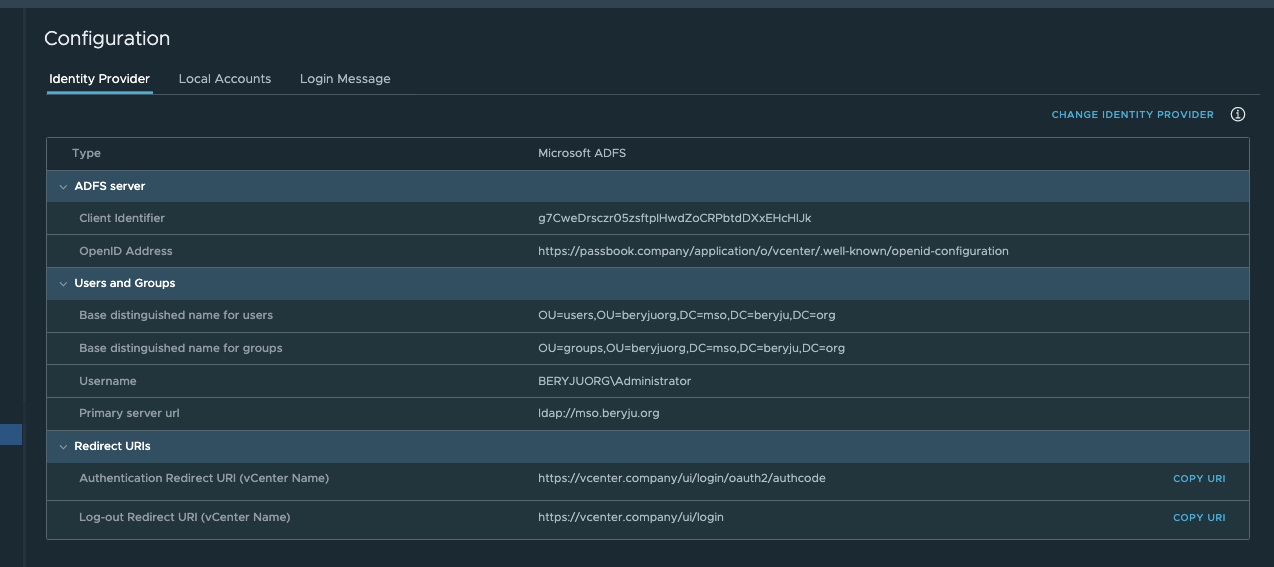
Login as local Administrator account (most likely ends with vsphere.local). Using the Menu in the Navigation bar, navigate to Administration -> Single Sing-on -> Configuration.
Click on Change Identity Provider in the top-right corner.
In the wizard, select "Microsoft ADFS" and click Next.
Fill in the Client Identifier and Shared Secret from the Provider in passbook. For the OpenID Address, click on View Setup URLs in passbook, and copy the OpenID Configuration URL.
On the next page, fill in your Active Directory Connection Details. These should be similar to what you have set in passbook.
If your vCenter was already setup with LDAP beforehand, your Role assignments will continue to work.