* Update Wiki.JS documentation

updated based on UI changes in latest Authentik version

under providers, removed settings that are now the default. default Subject Mode also works instead of changing to based on username.

under self registration note, updated to reflect that emails must match instead of usernames, tested with latest wikijs and authentik

* fix lint

Signed-off-by: Jens Langhammer <jens.langhammer@beryju.org>

Signed-off-by: Jens Langhammer <jens.langhammer@beryju.org>
Co-authored-by: Jens Langhammer <jens.langhammer@beryju.org>
2.9 KiB
| title |
|---|
| Wiki.js |
Support level: Community
What is Wiki.js
From https://en.wikipedia.org/wiki/Wiki.js
:::note Wiki.js is a wiki engine running on Node.js and written in JavaScript. It is free software released under the Affero GNU General Public License. It is available as a self-hosted solution or using "single-click" install on the DigitalOcean and AWS marketplace. :::
:::note This is based on authentik 2022.11 and Wiki.js 2.5. Instructions may differ between versions. :::
Preparation
The following placeholders will be used:
wiki.companyis the FQDN of Wiki.js.authentik.companyis the FQDN of authentik.
Step 1
In Wiki.js, navigate to the Authentication section in the Administration interface.
Add a Generic OpenID Connect / OAuth2 strategy and note the Callback URL / Redirect URI in the Configuration Reference section at the bottom.
Step 2
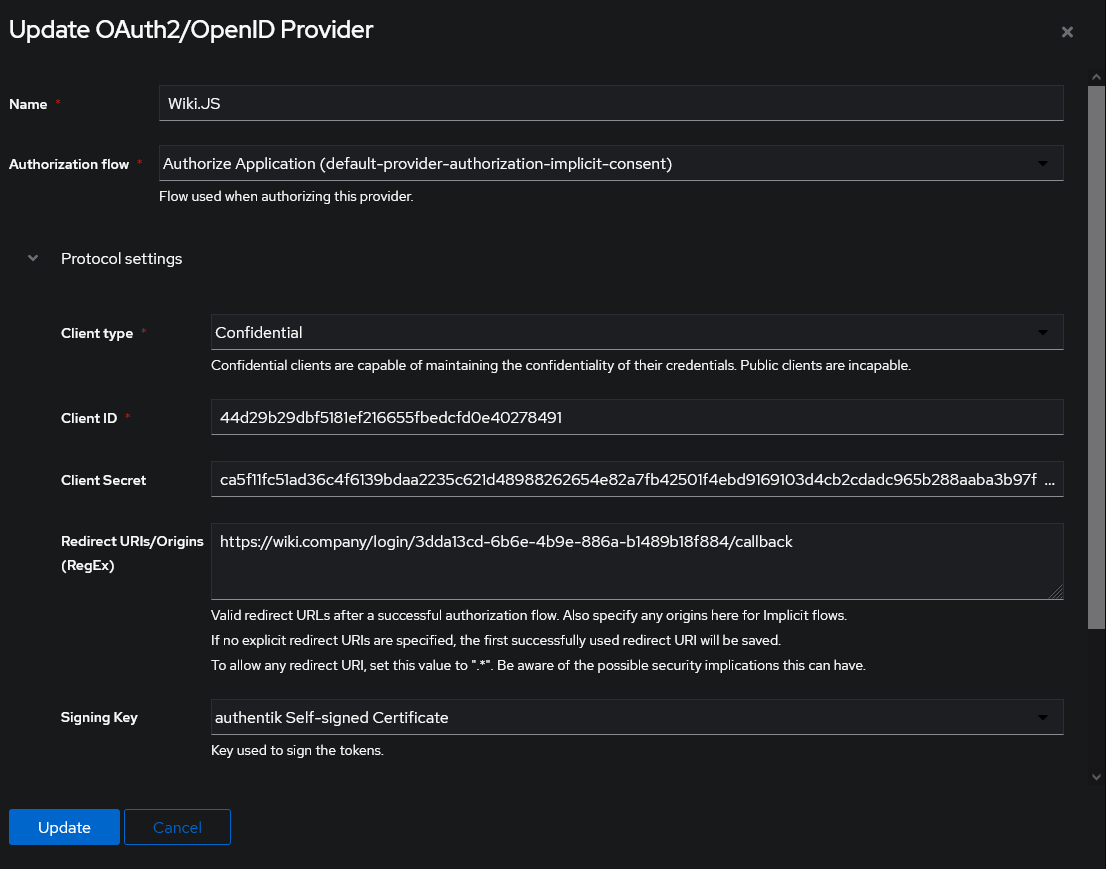
In authentik, under Providers, create an OAuth2/OpenID Provider with these settings:
- Redirect URI: The Callback URL / Redirect URI you noted from the previous step.
- Signing Key: Select any available key
Note the client ID and client secret, then save the provider. If you need to retrieve these values, you can do so by editing the provider.
Step 3
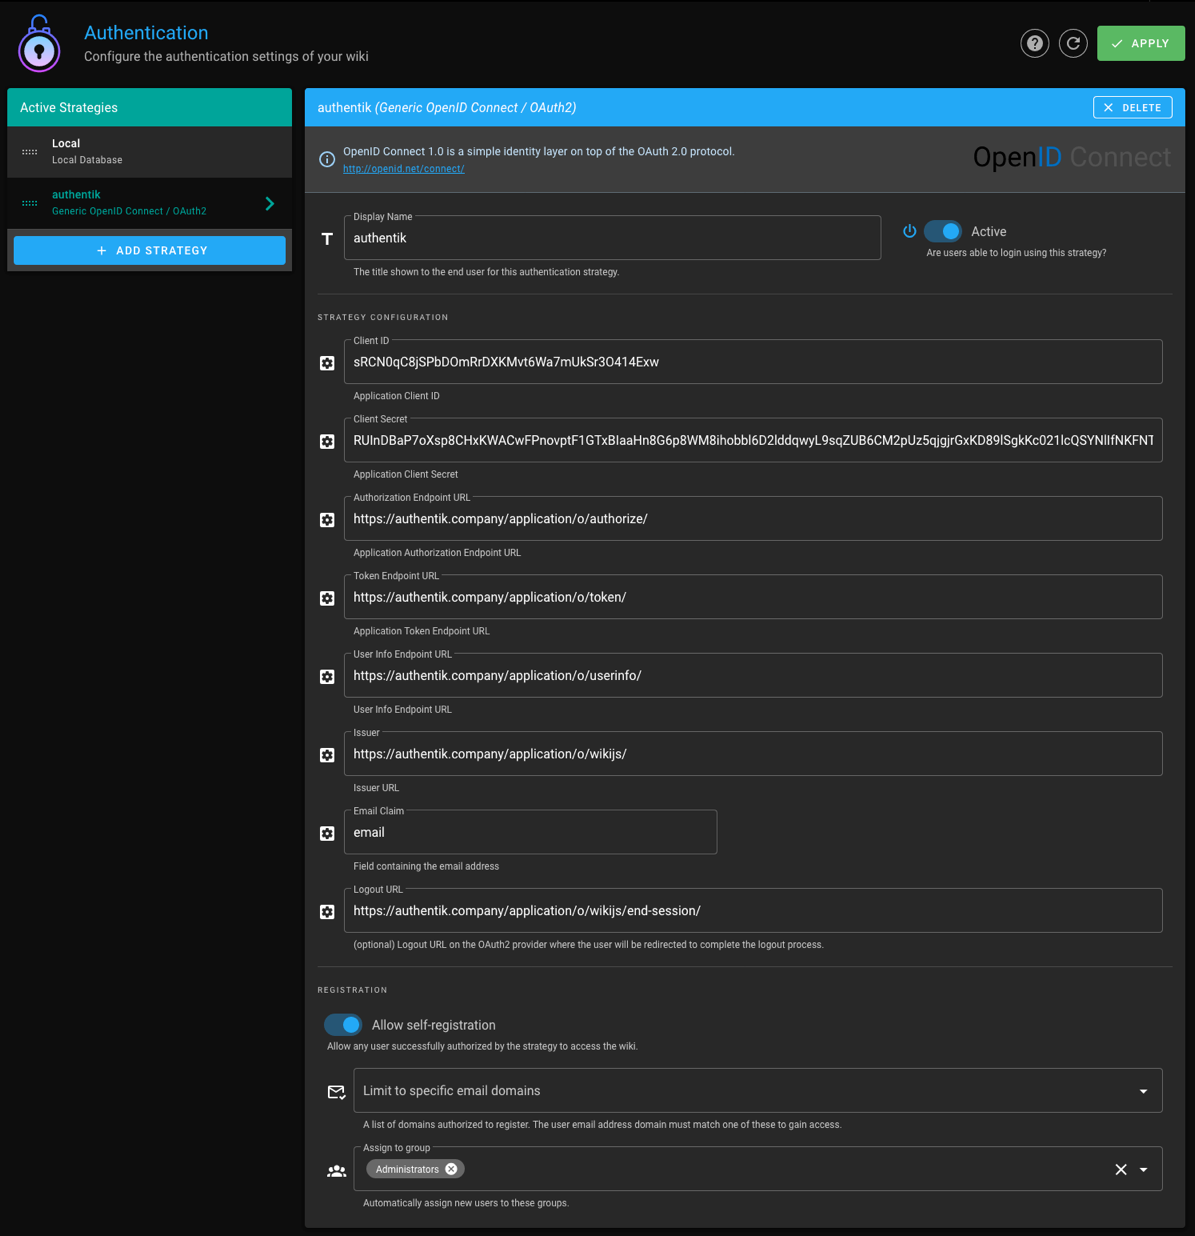
In Wiki.js, configure the authentication strategy with these settings:
- Client ID: Client ID from the authentik provider.
- Client Secret: Client Secret from the authentik provider.
- Authorization Endpoint URL: https://authentik.company/application/o/authorize/
- Token Endpoint URL: https://authentik.company/application/o/token/
- User Info Endpoint URL: https://authentik.company/application/o/userinfo/
- Issuer: https://authentik.company/application/o/wikijs/
- Logout URL: https://authentik.company/application/o/wikijs/end-session/
- Allow self-registration: Enabled
- Assign to group: The group to which new users logging in from authentik should be assigned.
:::note You do not have to enable "Allow self-registration" and select a group to which new users should be assigned, but if you don't you will have to manually provision users in Wiki.js and ensure that their emails match the email they have in authentik. :::
:::note If you're using self-signed certificates for authentik, you need to set the root certificate of your CA as trusted in WikiJS by setting the NODE_EXTRA_CA_CERTS variable as explained here: https://github.com/Requarks/wiki/discussions/3387. :::
Step 5
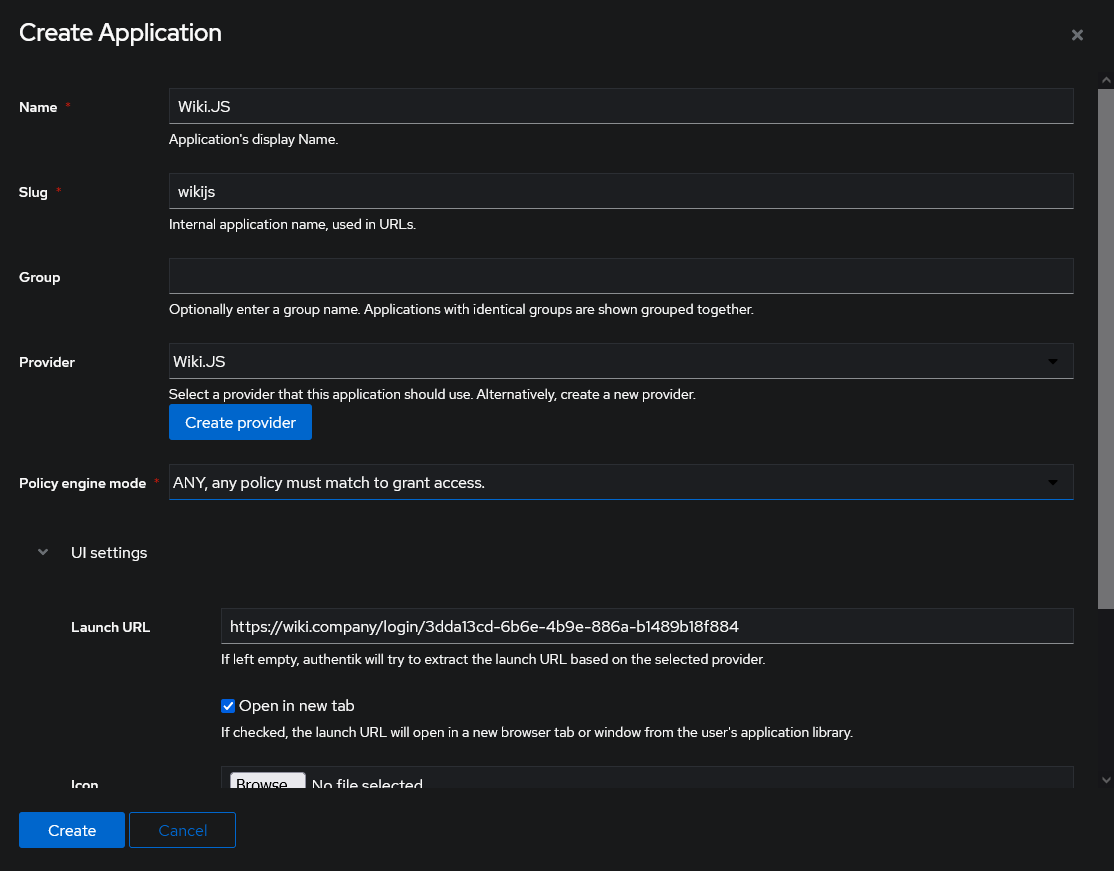
In authentik, create an application which uses this provider. Optionally apply access restrictions to the application using policy bindings.
Set the Launch URL to the Callback URL / Redirect URI without the /callback at the end, as shown below. This will skip Wiki.js' login prompt and log you in directly.


